How to properly hold a violin
Basics: Three main places of support
So how do you properly hold a violin?
When you hold a violin there are three basic points of support: two of the most important are the left side of the collar bone and the shoulder. The left hand also supports the violin and constitutes the third point of support called the auxiliary. The violin rests on the collar bone and the shoulder. The jaw can gently rest on the chinrest providing natural weight between the collarbone and the chinrest, preventing the instrument from sliding off the shoulder. Many players still struggle with incorrect posture and feel uncomfortable when playing. This often results in different kinds of injuries or ineffectiveness in practice because our muscles should be relaxed and free, focused, and ready to respond. If they happen to be stiff and tense, it will stop them from working efficiently and quickly. Even if any of your muscles are tense, that tension will spread over your body preventing your practice from being productive, efficient, and skillful. There is no worse scenario than practicing with tension for many hours, playing the same music and making the same mistakes over and over again, and not realizing why it’s happening. Don’t get frustrated, it’s just your posture that prevents you from playing better.
So, why do some young beginners have nearly perfect posture and technique, while others with years of practice and experience still struggle with old habits and lack of ease in playing? The important thing to realize is that everyone has a different body and we should consider an individual approach in setting up the violin including the shoulder rest, chin rest and left, and right-hand mechanics. For example, one student can find a shoulder rest best suited for his posture when another student will have to use a shoulder pad with an individually fitted chinrest.
Violinists come in all shapes and sizes, and what is most significant is the shape and placement of the body parts, that are most crucial to violin playing.
The chinrest
The chinrest was invented by Louis Spohr, a German violinist, conductor, and composer, in the early 19th century, around 1820.
When buying a chinrest, you should look to fill the space between the chin and the collarbone. The chinrest has two functions: to fill the gap between the violin and the chin and to protect the instrument and its varnish ( finish) from our sweat and continuous contact with the skin.
More details on using the chinrest
The chinrest should be tall enough to fill the gap between our jaw and the violin so our head and neck can stay balanced and relaxed. The height of the chinrest should not conflict with the shoulder rest because it will move the violin away from the collar bone which will raise the violin and cause discomfort. The head stabilizes the violin and gently sits on the chinrest, while the shoulder pad fills the space between your shoulder and chin, securing the violin from slipping and pivoting too easily. It’s important to remember that no pressure should be applied towards the chinrest.
How to choose the shoulder rest. The shoulder pad
Shoulder rest or a shoulder pad should fit between the back of the violin and the left shoulder to slightly fill up that space. The head stabilizes the violin and gently sits on the chinrest, shoulder rest, or a shoulder pad fills up the space between you should and the violin so the instrument is secured from slipping and pivoting too easily. . No pressure should be applied towards the chinrest.
If the shoulder pad cannot fill the gap or the gap is too high because of your body type, then you can use the shoulder rest which you can easily adjust to the right height. There are many types of shoulder rests and shoulder pads. I particularly like “ The magic pad ”. “KUN” or “BONMUSICA” shoulder rests are good choices if you decide to go with the shoulder rest. Usually, it takes time and effort to find the right setup, so don’t feel confused or discouraged if you are not comfortable with the current one and want to switch to another. As for me, I prefer a shoulder pad, because it gives me more freedom and flexibility in holding the instrument. One additional advantage of a shoulder pad is that it helps my instrument to sound brighter and more vibrant, dampening the sound much less than the shoulder rest. On the other hand, if you use a bigger shoulder pad with high-density foam that has substantial contact with the back of the violin it is likely to dampen the sound even more than a shoulder rest.
The nice thing about a shoulder pad is that it allows you to feel freer so you can effortlessly move the violin to the left or to the right, up or down, and be more flexible unlike the shoulder rest, which usually locks the instrument in the same position.
More specifics in holding the violin
Collarbone, shoulder, chin, and left-hand support
Always place the violin from above so it lands exactly on the collarbone and you feel more grounded and secure in holding the instrument. Let me explain it in more details. Why is it better to place the violin from above? First, we want to make sure that we do not move our head and grab the violin with the neck trying to push the violin inside our neck and clutch it with the chin. Second, we want the left shoulder to stay in place instead of moving downwards. You should only gently lower your chin on the chinrest when putting the violin properly on your collarbone and shoulder. Do not move your head sideways or move your shoulder down to accommodate the instrument. The violin sits on the collarbone and the jaw gently rests on the chinrest. You can hold the violin comfortably for long periods of time if you choose the right shoulder rest or the shoulder pad and chinrest so your body stays relaxed. Some violinists also use a protective cloth to cover the collarbone for more comfort and hygiene.

Hold the violin with your left hand
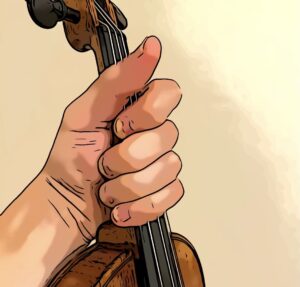
Take the violin with your left hand by hugging its neck. Make sure to hold it securely.
Place the violin from above not below
Step 1 – Take the violin with your left hand by hugging its neck. Make sure to hold it securely.
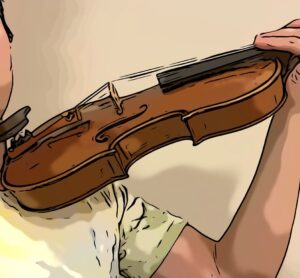
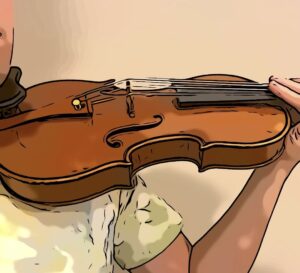
Step 2 Lift it in front of you and place it from above, not from below, on the collarbone. When you lift it, your shoulder comes forward with your hand to be ready for the violin.
Step 3 Let the violin rest on the collarbone and your shoulder. You can support it sightly with the left hand.
Make sure your body stays straight and you do not lean your head to the back or sideways. Avoid placing it from below by moving it higher to reach your shoulder.
How to rest a violin on the collarbone
It is very important to feel the violin on the collarbone so you feel grounded and it does not slide off. The head and the neck are balanced and do not pivot too much to the left or right, neither up nor down. Any kind of unnatural neck stretching or pivoting of your head while holding the violin can be tiring,
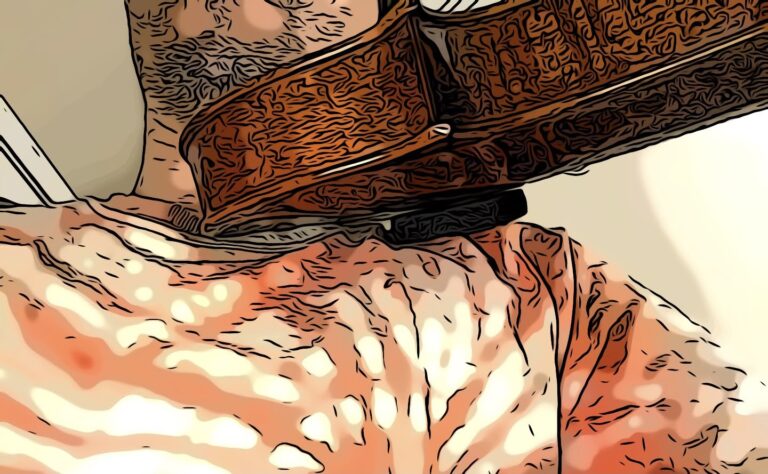
See below how a shoulder pad helps to support the violin apart from the collarbone.
Adjusted chinrest helps to fill the gap between the collarbone and chin
Your jaw should gently rest on the chinrest so it can secure the position of the instrument between your head and the collarbone. As you can see, the chinrest fills up the gap between the violin and the chin. If you are in the process of choosing a chinrest, I would strongly recommend Kreddle chinrest since it can be adjusted in many ways and has different height settings which you can customize and change angles in different ways. It is a truly universal chinrest that helped many violin and viola players in improving their setup. Many of my students and I had a very successful experience with Kreddle. If I take it off, the violin would be too low, and I would have to be forced to move my chin downward causing unnatural and unnecessary tension and neck stretching, which from my experience will result in pain even after a few minutes of playing.
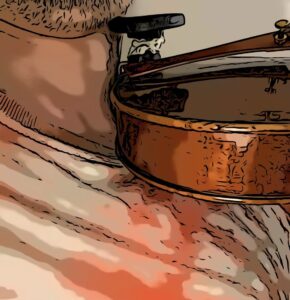
The third place of support- the auxiliary support. Thumb and first finger
The violin is also supported by the left hand and the neck of the instrument lightly rests on the base knuckle of the first finger and the thumb. Do not press or squeeze the thumb and the first finger. The thumb should be free and able to move in any direction while resting or playing. These two contact points of support are flexible and may substitute each other while playing or shifting.
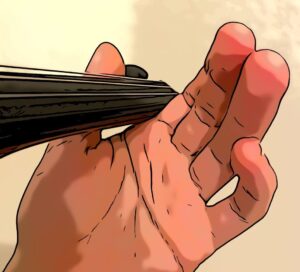
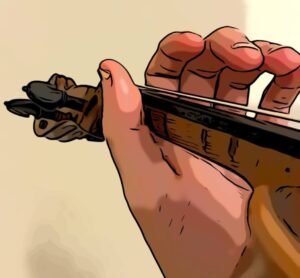
For example, when you are doing vibrato, the first finger does not provide that much support anymore, instead, it moves with the wrist and other fingers while vibrating. Otherwise, it can lock your hand and make your wrist and left hand tired.
see below left hand while vibrating
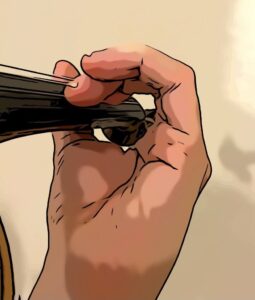
When you start your violin journey, it is helpful to simply hold the violin, walk around with it, getting used to it, and helping your muscles to understand the new setup. Pay closer attention to your body and your back, noticing any difference while moving with the instrument. Ideally, you should feel that the violin is a continuation of your body, organically connected to it.
Good luck in your violin journey.
I would love to answer any questions related to violin lessons and violin playing. You can email me at [email protected] or book your free trial lesson here.
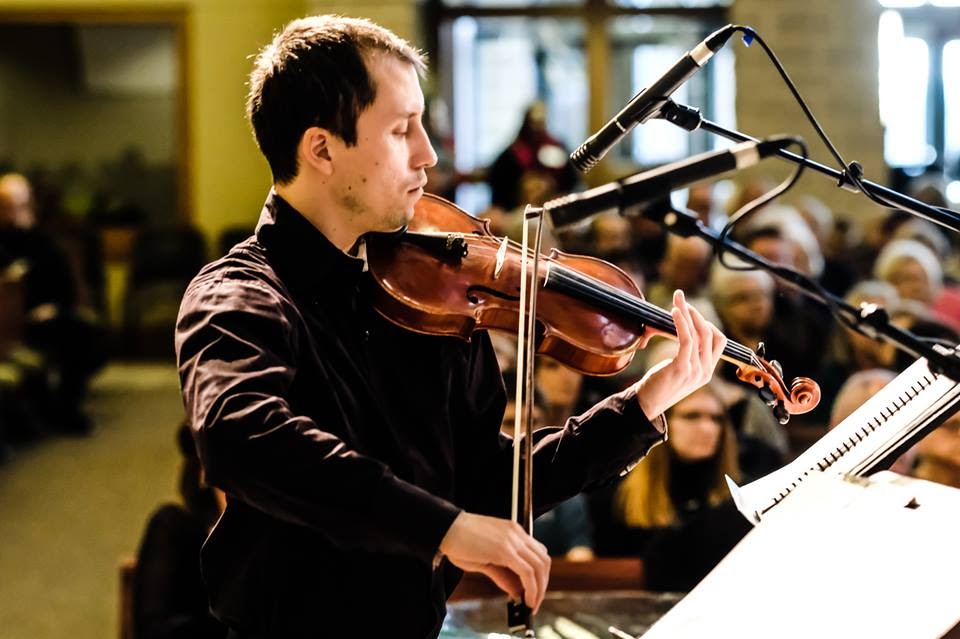
Internationally trained violinist Vlad Evstafiev holds a Master in Music diploma from Glenn Korff School of Music where he was accepted as a Graduate Teaching assistant studying with David Neely, a former student of esteemed Joseph Gingold.Vlad served as a concertmaster of UNL Symphony Orchestra in 2015-2017.
Vlad also holds a Performer Diploma in violin performance from Indiana University, Jacobs School of Music, where he studied with a member of Grammy awarded Pacifica Quartet, Austin Hartmann.
Vlad, originally from Ukraine, received his first Masters of Music diploma in Moscow, Russia, studying with Prof. Golovina, a former student of both, Leonid Kogan and Yuri Yankelevich. He worked professionally with many orchestras including The Bolshoi Theatre and Moscow Central Philharmonic Orchestra under Yuri Simonov. In 2010, Vlad was invited to join San Luis Potosi Symphony Orchestra in Mexico, where he played with them for four years as the assistant principal of second violins as well as in a professional string quartet. At the same time, Vlad worked as a violin teacher at the State of San Luis Potosi School of Music and taught privately as well. Throughout his career, he has had great opportunities to work with such amazing, internationally recognized well-known artists as: Yuri Simonov, Maxim Vengerov, Anton Miller, Ben Folds, Leila Josefowicz, Midori Goto, Joshua Bell, Gil Shaham, Pinchas Zukerman among others

